In our clinics we do not do routine hoof trimming. We will treat seriously overgrown feet, injuries to the coronary band/foot, etc. Because many of our patients are not trained, it may be necessary to treat/trim some horses under anesthesia. Though this is not a standard technique for handling horse’s feet, it does give students a good opportunity to learn how to trim without having to also hold the hoof up and deal with other horse handling issues. As always: record as much information about the work performed as possible.
Basic foot anatomy
The anatomy of the foot is affected by
- Conformation
- Nutrition
- Environment – especially moisture
- Injury – to the coronary band or other limbs resulting in increased/decreased load
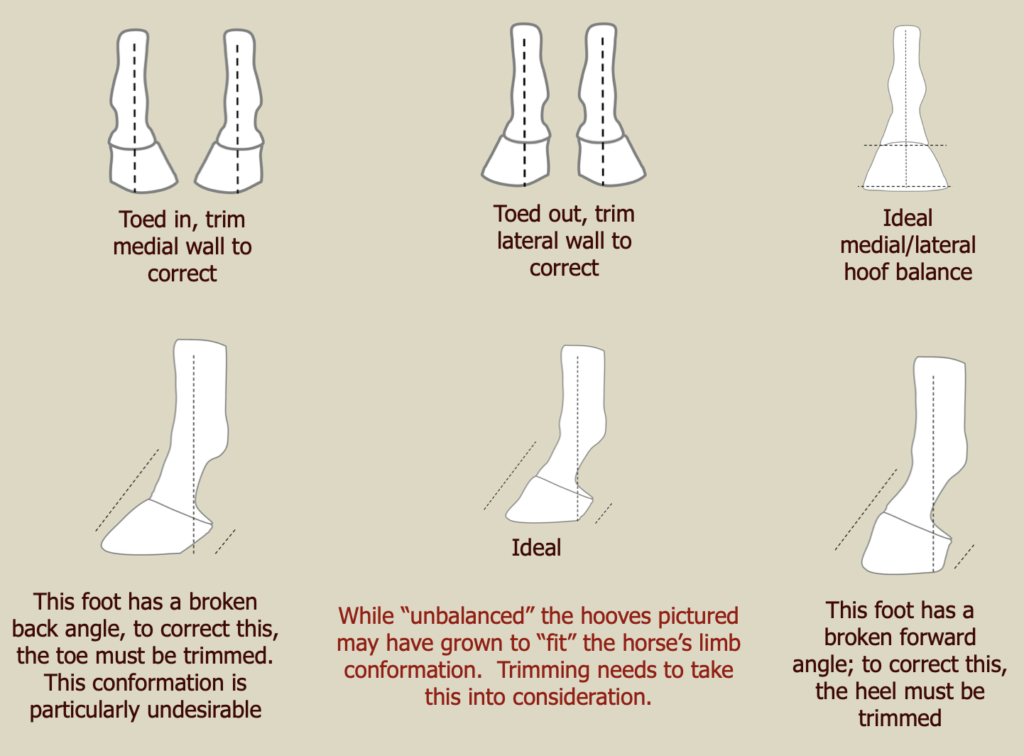
- In the standing horse, the dorsal hoof wall should be parallel to the dorsal aspect of the pastern as
 well as the line of the heel.
 - A line running straight down the palmar/plantar aspect of the cannon bone should hit the ground at the heel.
- A line running bisecting the limb/hoof should create two mirror image.
- A line drawn across the coronary band or the palmar/plantar hoof whould be perpendicular to the line bisecting the limb.
- A line bisecting the limb/hoof should create two mirror images.
- The frog width is 50-65% of its length.
- The weight bearing heel falls at the widest part of the frog.
- The distance from the line of the heel to the widest part of the foot should be 2/3 the total distance between the line of the heel and the breakover point.

Breakover point is the area at the front of the foot which is touching the ground when the heel leaves the ground


![]() The distance from the widest part of the foot to breakover should be 1/3 of the total distance between the line of the heel and breakover.
The distance from the widest part of the foot to breakover should be 1/3 of the total distance between the line of the heel and breakover.
Picking up the feet
Trimming the foot in an awake horse requires a fair deal of horsemanship. Always approach a horse, especially an unfamiliar horse, slowly, quietly, and confidently. If a horse is tied, make sure it is tied in a safe manner with a quick release knot. The horse should have at least a 18-24″ length of rope between the knot and where it is clipped to the halter to be able to move its head freely. The length of rope should not be excessive, however, as to allow the horses muzzle to reach below its knee (carpus). If the horse objects, at any point, to being touched/handled, while tied, it is much safer to untie the horse and have a second person restrain the horse in hand.
Do not immediately reach for the horse’s leg, but rather start the process of picking up the foot by standing at the left shoulder facing the rear of the horse. Make sure there is some slack in the rope between the halter and the tie (i.e. the horse is not pulling on the tie). If the horse is “at the end of the rope,” this suggests that they are uncomfortable and either need to be moved forward to release tension or untied completely. If you elect to have a handler hold the horse rather than work with the horse tied, make sure the handler stands on the same side as person working on the horse and holds the rope short enough as to have good control of the horse’s head. Do not allow the horse to graze. Keep the horse’s head up and either straight or turned slightly toward the handler.
Once the horse if comfortable with you standing at the shoulder, run your hand down the front left leg (starting at the shoulder area) and then gently pinch the flexor tendons just above the fetlock. Trained horses will often pick up their feet. If a horse is unwilling to pick up their foot with this cue, you can.also try pinching the chestnut. If a horse is not willingly picking up the foot, you can try to force the foot up by leaning into the horses shoulder and picking up the foot with both hands grasping just above the fetlock while simultaneously placing pressure on the back of the knee with your elbow. Have someone demonstrate this technique if you are not familiar with it.
If working on anesthetized/laterally recumbent horse, do not stand between the head and the chest or between the horses legs. Work with the horse’s legs in complete extension. Stand with you back to the horse holding the hoof between your legs, just above your knees.
Holding the foot in an awake/standing horse take practice and muscle development and balance. If you are not used to holding up horse feet, you will be amazed how quickly you become fatigued, especially when trimming at the same time. The exact stance you take will depend on your height, the horse’s height, the leg you are working with, and whether the horse has an injury or other physical abnormality precluding normal range of motion. Have an experienced farrier or horse handler demonstrate the position for holding front and hind feet as well as how to properly use a hoof stand as an alternative to holding up the foot with your body.
Trimming the foot
Deciding what to trim involves many factors as well. The goal of trimming a foot is to create proper balance across the foot. The definition of “hoof balance” varies from farrier to farrier and is NOT standardized. Generally, the hoof viewed from the front or back should be symmetrical around a line drawn down the axis of the phalangeal bones (from the fetlock to the ground). This is dependent, however, on the horse’s conformation and can be difficult to evaluate in the recumbent horse. Improper trimming resulting in abnormal loading will create excessive strain on joints and their supporting ligaments and can cause lameness. When in doubt ask for help from experienced farrier.
Toe/Heel length (hoof wall):
- Toe and heel should be trimmed to achieve normal hoof/pastern alignment as shown above.
- Err on the side of making the hoof/pastern “broken forward” a little. This is easier on flexor/suspensory soft tissue and the dorsal surfaces of phalangeal joints.
- Optimal heel/ toe length depends on horse’s confirmation AND differs between horses, burros, and mules.
- Rule of thumb – don’t trim more than you have to or feel comfortable taking off!
Frog:
- Excess frog covering the lateral sulci traps dirt and anaerobes – this should be removed to open the sulci.
- Frog confirmation is very different between horses and burros.
Sole:
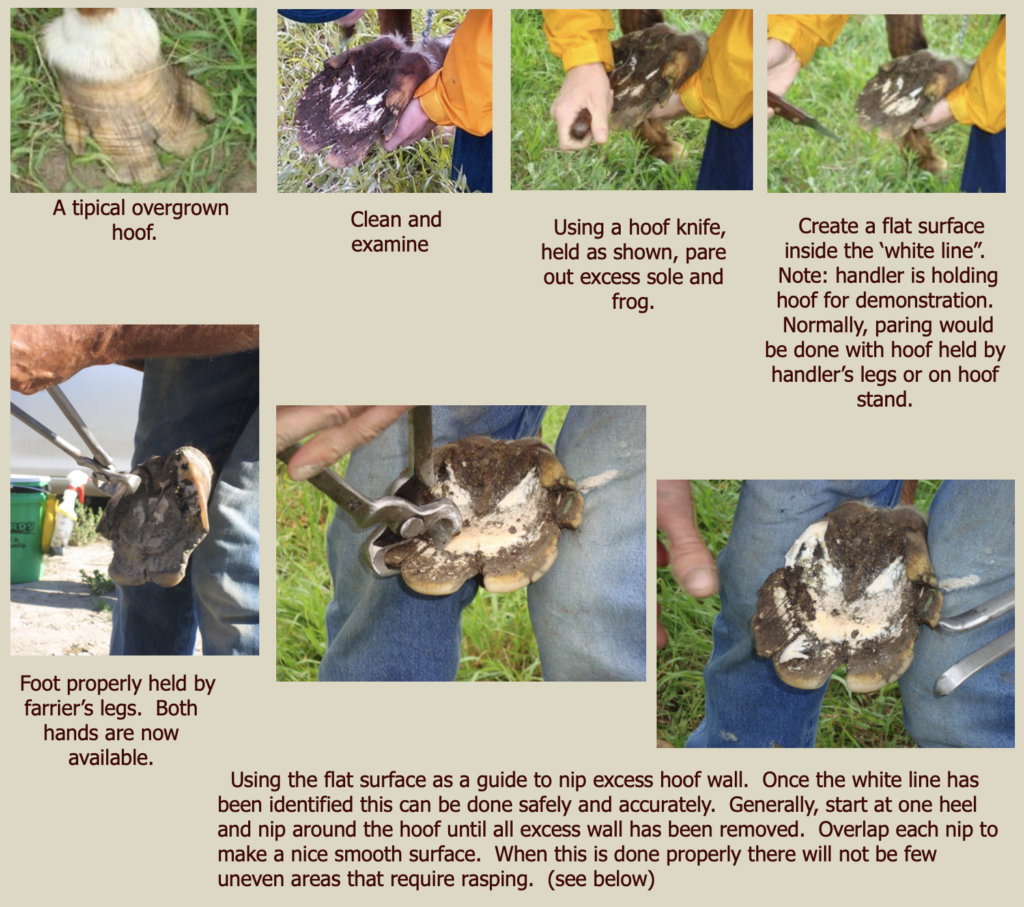
- The most recently secreted sole (sometimes called ‘live sole’) will be white/shiny/smooth.
- If you trim the sole too much your patient may need shoes or be sore.
- To avoid this trim away the flakey, older, cornified sole until you can see smooth, newer sole.
- Concentrate on making an arc at the toe, where the sole is the widest until you can clearly see the ‘white line’ that separates the hoof wall from the sole.
- Press on the new sole with a metal instrument (back of a hoof knife or a hoof pick) – if you can depress the sole with your instrument, you should not remove any more, unless you plan to put a shoe on the hoof.
- Bonus – because you have identified the “white line” by creating this “rookie ridge,” you can nip off the hoof wall abaxial to the white line (outside of it) without worrying about cutting sensitive tissue with your nippers.
Quarter:
- The hoof wall is much thinner at the quarters than at the toe.
- Try to leave enough sole to support the wall and do not over-nip/rasp the quarters – this will result in a weight-bearing surface that is not level.
Toe:
- Thickest part of the hoof wall.
- Should be rounded to allow easy ‘break-over’, but leave enough of the tough material to support and protect the sole.
Heel:
- Do not over trim!
- Better to leave a larger hoof angle than one that is too acute.
White line:
- The white line is the most distal expression of the junction between the dermal and epidermal laminae.
- It is the “target” when driving nails to hold a horse shoe in place.
- Its recognition is essential for the diagnosis of chronic laminitis, white line disease, and most hoof abscesses.
Bars:
- Do not trim the bars beyond what is necessary to remove excess horn that folds over and traps dirt in the crus of the sole.
Pathology
- Thrush/canker – Infection of the cornified tissues of the hoof that ranges from bad smelling exudate in the colateral sulci of the frog (thrush) to a proliferative lesion (canker). Both can deform the hoof and cause lameness. Removal of diseased tissue, with and treatment with local antimicrobials is required. Worse in draft horses and animals kept in wet corrals. Much rarer in range horses.
- Dirt – Long hooves allow the trapping of dirt, which provides an excellent environment for anaerobic growth. Sand and gravel can also damage the sole and wall, contributing to the development of abscesses.
- Laminitis – In our environment this is usually seen in the context of chronic founder in horses prone to equine metabolic syndrome (mainly ponies). Trimming of “curly toes” is complicated by anatomical distortions in the hoof.
- Abscess – Development of bacterial growth between the wall or sole and the under-lying sensitive structures occurs as a result of dirt getting through the hoof capsule. The condition is acutely painful and requires the establishment of drainage by removing cornified structures that trap the dirt and anaerobes. Certain soil types and hoof confirmations predispose a horse to abscesses.
Tools
In this section we will discuss the characteristics of a good tool for each of the common tools found in a farrier supply kit.
Nippers – flat:
- Hand made and tempered quality steel – you get what you pay for!
- Very sharp and designed to maintain the cutting edge.
- Handles can range from 10” to 14”, with longer handles increasing leverage and cutting power – often necessary in draft cross horses on the range.
- This tool is the most important of the trimmer’s kit.

Nippers – ½ round:
- A very handy additional tool that allows easy paring of the sole and taking down large portions of hoof wall quickly.
- Especially handy for dealing with abscesses and hoof cracks.
- Use this tool with caution and you can very easily take too much hoof and cause serious damage in the hands of an unskilled trimmer!

Hoof knife:
- Both left and right handed versions.
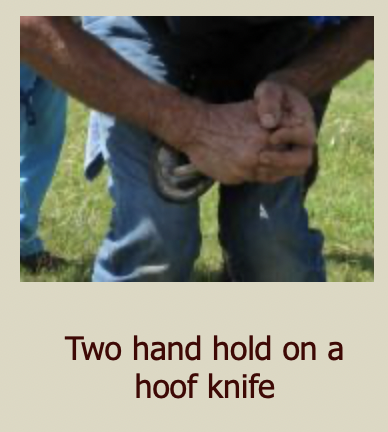
- Handle should be large enough to allow for a two-hand grip.
- Blade length – shorter blades allow more leverage in paring and can get into tighter places when opening an abscess.
- “Loop knives” have become popular and have the advantage of having both a “left handed” and a “right handed” blade on the same knife.
- Buy good quality knives and keep them sharp. A ‘diamond hone’ made for hoof knives is a must.
- Because hoof trimming takes force it is easy to slip and cause serious lacerations to the operator and the patient. Think about how you are pointing the blade before you use it!
- Hoof knives are held so that the blade is exiting the fist by the little finger and the butt of the handle is under the thumb. When possible hold the handle with two hands.
- Efficient trimming takes practice and requires wrist action. This will be demonstrated during clinics.
Rasp:
- Do not skimp on rasp quality. When they wear out, get a new one.
- Farrier’s rasps only cut one way (away from the handle). Attempting to rasp the other direction is wasted effort.
- Rasping is performed with two hands. The end of the rasp away from the handle is used to “pull” the rasp across the hoof. The other hand gently pushes and “steers” the rasp with the handle.
- Wear gloves while rasping in order to avoid bloody knuckles.


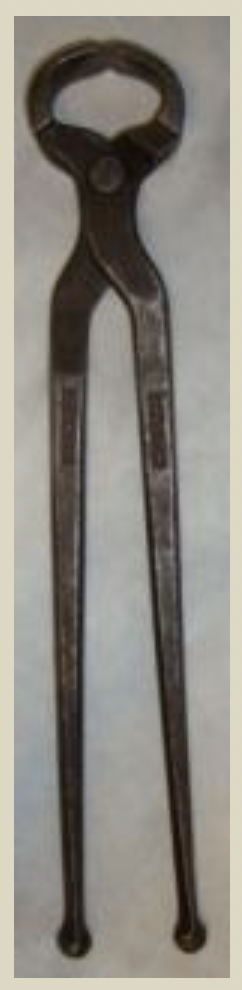
Pull offs:
- These look similar to nippers but are a cheap dull tool for removing horseshoes.
- “Crease pullers” do the same thing but just one nail at a time. These are particularly useful in shod horses that have laminitis or cracked hooves.

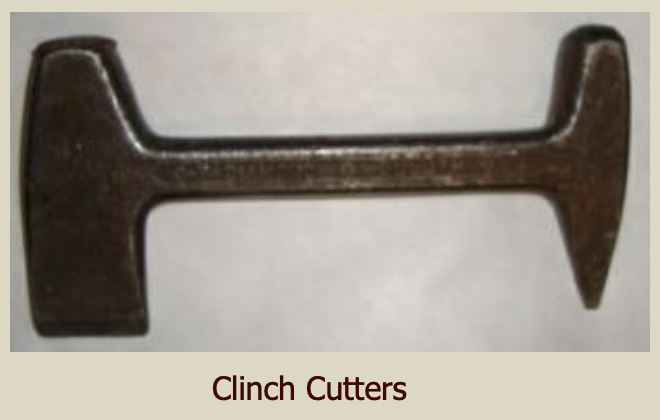
Clinch cutter:
- If a horse has shoes that need to be removed, the first step of she removal is to cut the clinches that hold it in place should be cut.
- This is the tool is used to cut the nail clinches – the visible portion of the nail in the hoof wall that has been folded over.